A Look Back on our hobby
Topic: Combine Car
Model Railroading - The beginnings of Virtual Railroading
By Brian Eckard
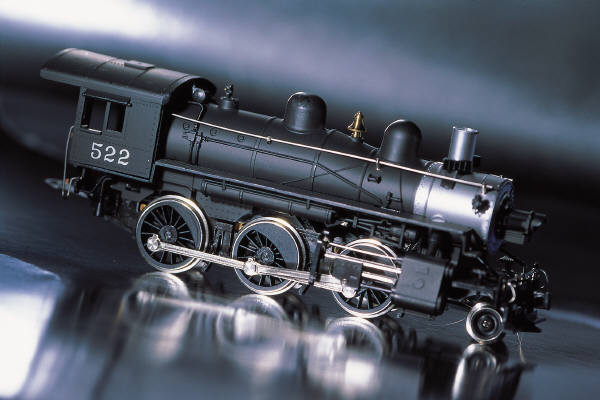 Before the age of computers railroads were simulated by rail fans on tables using models powered by small electric motors. Since these simulated representations of railroads used wooden and later plastic models of railroad equipment it was conveniently referred to as model railroading. Model railroading has been around ever since there were railroads, so this is a very old hobby going back at least 100 years. The first model trains were push toys that eventually were put on tracks. When small electric motors became available these early models were powered.
The models were big due to the size of the electric motors. The large scale meant that you needed space if you wanted to build a model railroad layout. Many of these early layouts found a home in attics, and basements. As the size of the electric motor became smaller, smaller modeling scales became possible. The smaller you made your models, directly resulted in less space being required for your layout.
Sometime in the 1930s the model railroad hobby started to focus on realism in its models, and also in train operations. It was no longer kosher to run trains fast, but to run them slow trying to simulate the speeds with which their larger counterparts actually ran. Realism was the name of the game, and the magazines of the day started to promote it as an integral part of the model building and train operations.
The quest for smaller scales continued as advances in small electric motors continued to evolve. The most popular scale moved from the larger scales into O-Scale, then HO, N, and in the 70's Z-scale. Each scale offered improved modeling capabilities in smaller spaces. The major drawback of model railroading was real estate, and the smaller scales were starting to make it possible for just about everybody to have the capability of having a model railroad layout.
With the real estate issue addressed, the next major hurdle to overcome is the cost of model railroading. A quick glance through any of the model railroad magazines today and you will see very quickly that it costs money to have a model railroad. The hobby has lost its early focus on creativity and the craft of model building. Now you can simply purchase pre-assembled models that cost a lot of money. You can even purchase a layout so that you don't have to build it. The hobby has moved to the instant gratification crowd, and the older generation of craftsman model builders will simply fade away into the history books as a distant memory of when model railroading was more a model building hobby than a money pit.
I have had to stop model railroading because I simply cannot afford the cost of buying locomotives, rolling stock, and scenery items. It is simply too expensive to justify the cost. I also don't have the real estate for a layout.
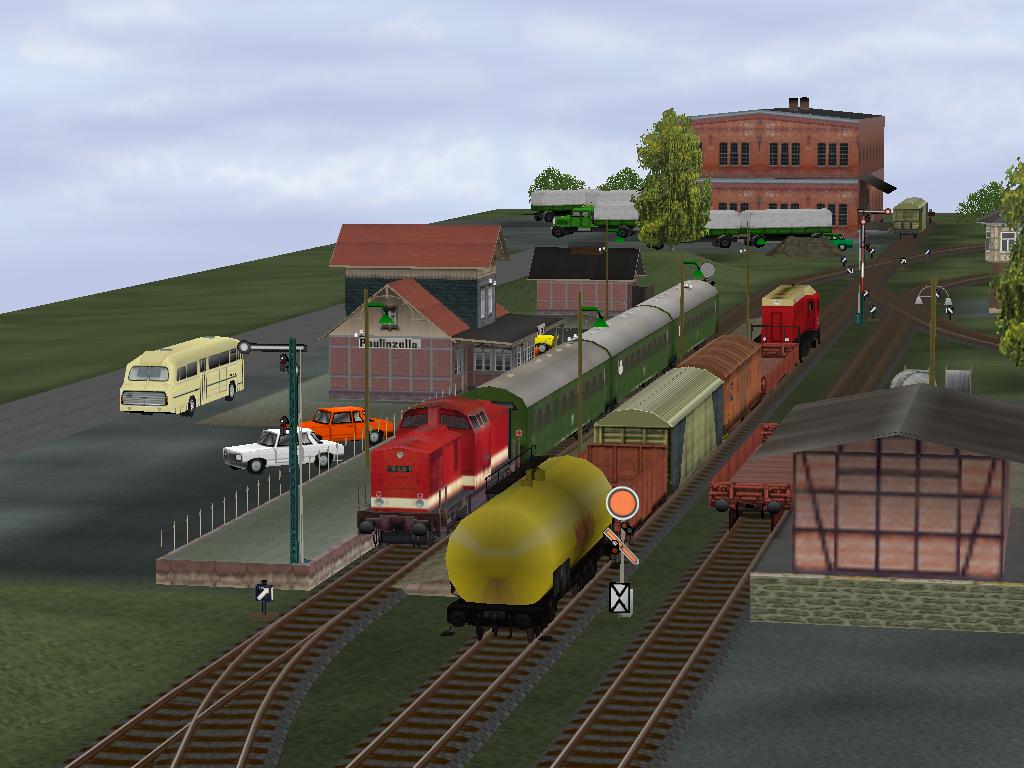 When the first home computers hit the market place in the early 1980s few model railroaders would have ever dreamed that virtual railroading would be possible. As advances in computer technology continued to push the processing speed faster and faster, graphic intensive programs became possible on home machines. From the very beginning flight simulators became available for the home PCs and started a brand new hobby of virtual flying. Flight simulators laid the foundation for virtual railroaders and train simulators.
The possibility of modeling train operations on a PC rather than a table top meant that space was no longer an issue. The tradition of free downloads of flight simulator planes and scenery set the stage for free downloads of train models and routes. The free exchange of models on the Internet has made it possible for me to continue in my hobby of model railroading--just on a virtual level rather than physical.
Virtual Railroading uses many of the same modeling skills as Model Railroading
 The virtual railroad modeler can easily import many of his modeling skills that are used when building a model railroad layout. Since virtual railroading is so new many scenery objects and train models have to be created from scratch. This is a very similar history that virtual railroading shares with modeling railroading. In its early years model railroaders had to create from scratch most of their models and scenery objects. Model kits and ready made models were simply not available. The hobby was based on the craftsman skills of the modeler.
In virtual railroading the same demand for craftsman skills is required of the virtual 3-D modeler. Instead of balsa wood, cutting knives, and glue, the virtual modeler uses 3-D graphics software and painting programs to work his craft. It takes time to create these models and hence the layouts that they were created for. That is also another common trait with model railroads. It simply takes time to model a railroad, regardless of if it is a physical model, or a virtual representation.
Creating a route or layout in the virtual world requires the same forethought and planning that a model layout in the real world requires. Attention to detail adds life to the virtual layout just as it does on any model railroad. It also takes time to build a route or layout that can span over the years.
How do you get started in Virtual Railroading?
 Just like model railroading, virtual railroading does cost money to get started. However, there are some free programs that you can download to try out and see if this new form of an old hobby is right for you. If you are interested in easily creating routes, 3D modeling, and being able to explore the virtual worlds you created outside of a train, then one of the full 3D rail simulators might be right for you. Regardless of whether you download free simulators, or pay out money for one of the retail versions you will be able to find thousands of free models and scenery objects available for download on the Internet. That is actually where your cost savings begin in virtual railroading. Unlike model railroading, you will not have to purchase most of the models you use on your layout.
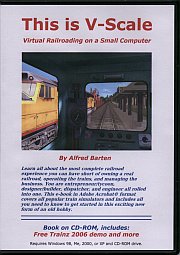
I would like to recommend to you a brand new e-book that has been released that will give you a complete introduction to virtual railroading. It is called "This is V-Scale" and it is written by my good friend, Alfred Barten. He has compiled an excellent collection of articles that have appeared on his Virtual Railroader site over the past few years into the definitive book that explores this new and exciting slant on an old hobby. It is well worth the cost which also includes shipping and handling. Remember, you don't need a PayPal account to purchase the book. Don't let that hold you back. If you are new to virtual railroading than this is a must read!
Designing a virtual model railroad
In this portion of the article I would like to walk you through the process required for designing and building a virtual model railroad. This example will use the Trainz Railroad Simulator since it is the one commercial simulator available on the market that will simulate model railroading with ease. The Surveyor editor in Trainz is very user friendly and features a ruler that we can use to design and build our layout.
 The layout design that I have chosen is a simple loop that also provides passing sidings. The original layout was actually my first real model railroad that I built with my dad when I was a kid. I called my HO scale model railroad the Utah and Rocky Mountain. We built this layout and placed scenery on it for Christmas one year. The five foot by nine foot table was cut in half and carried upstairs to our living room where it was set up under our Christmas tree. The original era modeled was in the late 1800s and the layout featured western looking towns, locomotives and rolling stock form the old west.
After the Christmas season that year the layout was returned to the basement where it was permanently joined back together. That layout was finally torn down after I finished up high school in 1978.
If you want to design your own virtual model railroad, I recommend that you read this great introduction to layout design from our friends over at Model Railroader.
Effective layout design
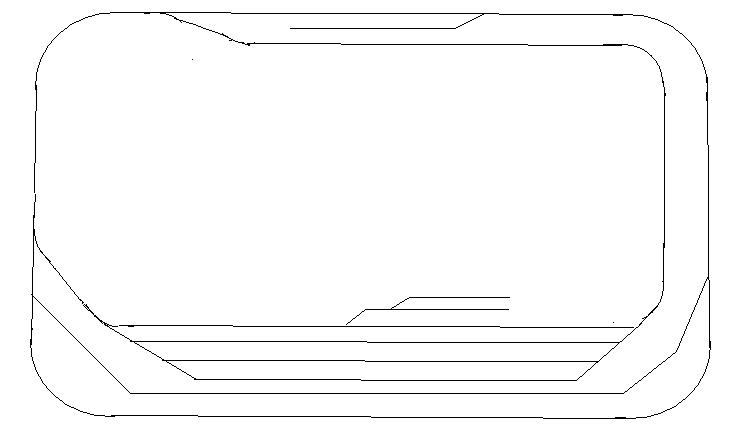
When my original HO gauge layout was built, the most important thing to me was running trains--specifically passenger trains. I had little interest back then in frieght operations. So, if you look at the layout design above you can quickly see that it is a loop that permits train running. On the original layout at the front I created a passenger station with platforms along the various pull through sidings. The layout was simply perfect for what I wanted to do with it when I was young.
When building your own layout, or virtual layout the first question you should ask is, "what do I want to do with this line?" Take the time in the beginning to determine what types of train operations you want to model or simulate. The answer to this question is key to the type of layout design that will meet those needs. As time passed I slowly moved away from loops of track and more into point to point operations like the real railroads. I lost interest in model railroading around this time because of other obligations and also because a point to point layout of any decent length would require a lot of space, which had did not posess.
Then came the train simulators and the space issue was no longer a valid reason to stay away from the hobby. As a matter of fact the train simulators do rather well with point to point operations precisely because that is what the real railroads do in practice. They literally go from one place to another. The train then must be turned around in some manner so that it can make the return trip to its original starting location. All of this action is required on any railroad regardless of whether it’s a model, the real thing, or a virtual model.
Once you have your design created it's time to build the layout. If you are building a real model railroad I would suggest creating a virtual version of it first so that you can test your design and make sure that it meets your operations goals. Once you are sure you have a design worth building, the virtual version can be used to practice how operations will be conducted while the layout is being constructed. So, the train simulators can actually become a very valuable tool to the traditional model railroader.
For the virtual railroader we have another option to consider that is simply not possible to the traditional modeler. That option is to build your layout using the actual terrain of the location of the railroad. For example, my Utah and Rocky Mountain railroad conducts its operations in Colorado, Utah, Idaho, and Washington. Why not use dem-based data to recreate the actual terrain in the simulator, and then build the layout on that terrain. So now I have a model railroad that is what I would refer to as a semi-prototypical virtual railroad. It doesn't exist in real life, but because of the terrain the layout takes on a life of its own that is very close to what it would be if it had really existed.
Check out my article series here at the SJPC site about my Utah and Rocky Mountain. I will be building it soon, and there will be more articles added to that collection. For our purposes, this article will focus on building the 5 x 9 foot layout that I had as a child. I will show you how to use the Trainz Railroad Simulator to recreate a virtual version of this model railroad layout. This technique can then be used by you to create your own virtual model railroad layouts.
Building the Utah and Rocky Mountain in Trainz
Using the track plan and rulers, I outline the shape and dimensions of the the layout. These rulers will become my borders when I lay the track. These dimensions then dictate how sharp to make the curves and how long to make the straight portions of the track. Using the track plan as a guide, I lay out the track.
Create the layout working area
1. Start up Trainz and navigate to the Surveyor module.
2. Select Create New.
3. Fill in the basic information about the new route. We are building the layout as an HO-gauge route. The gauge will determine how the rulers work in the editor.
4. Click OK and the first tile of the route appears.
5. Click on the Tools tab.
6. Click on the Add ruler button.
7. Move the camera so you are looking directly down on the tile and can clearly see the gridlines.
8. Pick a start point (leaving room for the layout rectangle) and stretch the ruler to 5 feet on the left side.
9. At the lower left corner, add another ruler making it 9 feet long.
10. Complete the rectangle by adding a ruler for the right side, and top of the layout. You should now have a rectangle created by the rulers that represents a 5 x 9 layout in HO-gauge.
Handling Curves
The original layout had 18 in. radius curves. To create 18 inch radius curves on the layout we will use rulers that are 9 inches long. Since there are 12 inches to one foot, 9 inches represents 2/3 of 12 inches. Convert it to decimal by dividing the numerator (2) by the denominator (3). That would equate in decimal to .66 feet on our layout. For each curve set up one ruler in the middle of the curve and two additional rulers on each side. That should provide enough "points" for you to create a curve track that closely follows an 18 inch radius on our layout.
Creating turnouts
In Trainz, switches are actually very easy to do. The trick is to make them look smooth and realistic. The switches I used on my model layout had curves that matched the 18 inch radius used on the curves. So when making your turnouts, I would suggest creating the turnout first and then use rulers set at .66 feet in length to get the curvature to look correct.
Laying the track
Save the image of the U&RM track plan (above) and print it out. Use it as a guide to lay the trackwork. On the original layout the track was flat and had no elevations to worry about. In situations like this I will usually set the track elevation to .50 to raise it slightly off the ground. To me, this simply improves the way the track looks on the finished layout.
Once I'm satisfied with the track work, I start to work on the terrain. First I use the terrain tool to bring the ground up to the track level. Then I look at the layout and determine where hills should go. On the orginal layout I had a mountain located on the back right corner. The tracks went into the mountain via tunnels. Other hills were placed to make the terrain look more natural and not so flat. Use your descretion and create rolling hills on the layout.
Painting the scenery
Once all the hills and mountains are in place I use the selection tool in the textures tab to mark out the rectangular layout portions. I pick a texture that will act as a underlying texture that is visible along the edges of the layout. I use the selection fill tool to quickly apply this texture. When this is completed I can see the general form of the layout, which for our layout will be a 5x9 foot rectangle. Next, I delete the rulers since the texture now provides my borders. Finally, I use a black texture and move the cross hair cursor to the grey area of the base board where the grid lines are visible, and use the baseboard fill tool. This applies the texture and makes for a nice appearance on the layout. Once the scenery is complete it really gives the layout a finished look.
On the original layout the scenery represented an arid environment, so there were lots of browns and very little green. Click on the texture tab and select Australia as the country. The textures grouped in this area are a good representation of an arid landscape. Select the textures that you want to use and drag them down to the palatte. Apply the textures to the layout.
After the terrain has been painted with the textures, create the towns that the railroad will serve. On the original layout, the city of Grand Junction occupied the center of the table and used the pull through sidings at the front of the layout for its passenger station. The town of Weston was located on the back left corner and was a small town with only a few buildings. A warehouse was located on the siding at the back left side of the layout. The town of Easton was located at the front left side of the layout and consisted of a small passenger station and two or three buildings.
After the scenery is done it's time to set out the rolling stock and run the trains! In Trainz this is done in the Surveyor module. Click on the rolling stock tab and add your trains to the layout. Save the layout and go into the Driver module and choose your new layout. Have fun running the trains! --Brian
Powered by Qumana
Posted by woodbrdge
at 7:27 AM PDT
Updated: Wednesday, 27 February 2008 7:45 PM PST
 What is virtual railroading? Is it a game? Or, is it a hobby? Is it simply another avenue to model railroads with? Why are people either firmly for it? Or, vehemently opposed to it? Our title for this article is actually a qoute from a father to his son at a train show. It accurately reflects the attitude of the old school of model railroading, and the conflict with the younger generation who has been raised with a gaming attitude. How does virtual railroading get past this apparent mountain that blocks its acceptance into the mainstream of the model railroading hobby?